 |
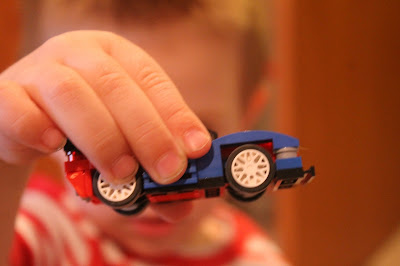
| First game was building Lego cars. |
 |
| After building Lego cars, they made a ramp for tricks. |
 |
| Lunch was turkey, cheese, melon and Lego juice boxes |
 |
| Tie-dye cupcakes* with Lego candies* on top |
 |
| Lego pinata time! |
 |
| Success! |
*To do tie-dye cupcakes, separate your white (or I did funfetti) cake batter into different bowls based on how many colors you want. I did four colors (red, yellow, blue and green). After adding the food coloring, put a teaspoon of each color batter in different layers in each cupcake liner. So for example, in one I layered a teaspoon of red, blue, green and yellow cake batter. In the next one I did blue, green, yellow, red. Just make sure not to overfill the cupcake liners so your cupcakes don't overflow when they bake.
*The Lego candies I used is called Candy Blox. I found it at Meijer (a local grocery chain) but you can order them from Amazon. I made sure all our food was peanut and tree nut free (hence why the pinata was full of suckers, Cheez its, fruit snacks and Nutri grain bars) and this candy is safe. You can also buy Lego minifigure and block molds if you want to get fancy with decorations. I used the Lego mini figures to decorate the tops of the cupcakes we had at the family birthday party (since I didn't want to take a chance with chocolate and peanut allergies).
I got a lot of the decorating ideas from Pinterest (my Lego party board) and below are the links to the original blog sites I found and the table-scape broken down for you.

1. Lego Brick Favor Boxes and Free Printables - delia creates. I used the free printable of the party favor brick boxes and filled them with Lego stickers, little bags of Candy Blox and a random mini figure for each guest. I also printed off the Lego bumps and used those as the juice box covers and to make the #7 on the Happy Birthday sign.
3. Less Mess Lego Pinata - handmade mommy. By far, the best pinata tutorial I have seen. I followed this step by step and it turned out AWESOME! We were really surprised to not find a store-made pinata, but I am glad I found this and decided to hand make it. It really did not take long to make at all, maybe 3 hours (drying time is the longest) and I had all the supplies on hand already.
4. Party Smartie Cupcakes - Castle Bakery. I saw this picture and knew immediately that I wanted to use this for Gabe's Lego party. I bought plastic champagne glasses from Party City and filled the bottoms with Legos and put the cupcakes as the topper. It really made them look fancy and the boys LOVED that there were real Lego's in the bottom that they could build with as they were eating.
5. Lego Kirigami - zakka life I didn't number it, but this is the link to the template where you can make the Lego mini figure that I used with the sign and on our table. I saved the cut out and resized it with Photoshop Elements to make it big enough for two to fit per page. We also cut out extras and hid them around the house as a "Hide and Seek Lego guy" game.
6. The Happy Birthday sign I made myself using the Lego Thick font in my Photoshop Elements program.
I think that covers all the decorations and the party itself. If you have any questions, feel free to leave a comment. I am still working on installing the 'Pin it' button onto this blog, bear with me. If you need any other ideas, check out my Pinterest boards by following the link above :)
UPDATED!! Pin this idea!
Follow my blog with Bloglovin


This all looks amazing...considering how much Aaron loves Lego's maybe I should do this for his next birthday haha! I especially love the cupcake presentation!!
ReplyDeleteI love how the cupcakes turned out! Do it! It was totally worth it to see Gabe so happy and excited, I bet Aaron would be the same :)
ReplyDelete