Showing posts with label Birthday. Show all posts

Monday, March 31, 2014

Nerf Wars Birthday party

We have been planning this birthday party for awhile.  

I am crazy like that, where I get an idea in my head and have to figure it all out before it drives me crazy.  I don't really remember how I got the idea for a Nerf Wars themed birthday party, but as soon as the idea came I began researching (Pinterest) how others had done their party and slowly a plan began to take shape.
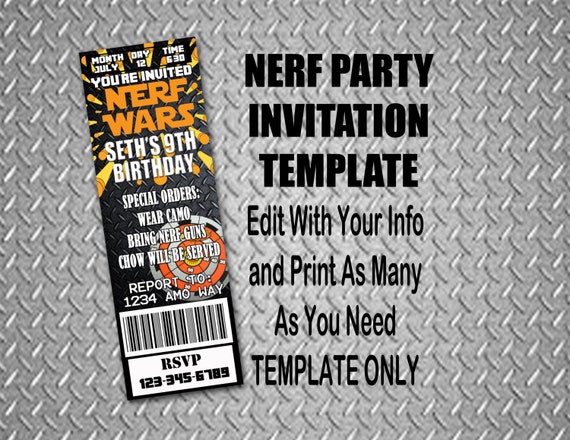
Bonkers4Bottlecaps
I ordered the birthday invitations from an Etsy.com store called Bonkers4Bottlecaps.  It is awesome.  Basically it's a printable layout that you can customize with Photoshop to put in your child's name and birthday info.  There are also ones that you can order and have the shop edit for you if you don't have Photoshop.  You get an email when the file is created and can customize it immediately.  Ours cost $3 for the file and then I had them printed on 4x6 photo paper (so two fit per page) at a local Rite Aid photo center.  Very cheap to do, but they look awesome!

Then the birthday party came.


Everyone got a bandana, sunglasses and a pack of 10 darts.  At first, we thought about doing colored bandanas for "teams" but we ended up deciding to go with random colors in case any one was upset about not being on a team with another friend.  (Ordered a 12 pack of bandanas from Amazon)

Originally we thought the sunglasses would just look cool, like super cool Army guys or something, but the boys ended up really needing eye protection (what with all the random darts flying every where) so I am glad they all wore them! (Sunglasses are from Party City - $1 a pair)

When all the parents called to RSVP, I suggested that they leave their darts from home at home because they would probably get lost.  I bulk bought darts on ebay.com and got them incredibly cheap - 200 darts for $16.  If you are looking at hosting a Nerf party, I would definitely look into sellers on ebay.   Make sure you give yourself enough time to get them, since most sellers are overseas.

After making sure that none of the boys coming had skin allergies, we ordered camouflage face paint.  At the party, the boys grabbed their gear bags and we quickly put on camo paint so they could load their guns and listen to the "safety briefing".  I opted to buy a more expensive face paint stick (Camo Face Paint stick from Amazon) rather than the traditional costume paint because it was so easy to apply.  All we did was draw a line under each of the boys' eyes and smug it a little with a cotton ball.  

During the "safety briefing", we went over the rules of Nerf Wars.

No shooting above the shoulders or pointing a gun at someone's face.
No shooting an unarmed or unloaded person (if you ran out of darts you had to put your hands up).
Make sure to listen and respect every one.


We had different target practice games planned as team events.  Since we had twelve boys and five adults, we split them in four groups of three for the team shooting relay, the balloon and Army guy shooting match.


The house was decked out for Nerf War battle.  I knew my boys would be pumped shooting darts in the house and I didn't want anything to get broken or damaged.  I took down all the picture frames and family mementos and replaced them with targets, plastic toys and balloons.  I didn't want to spend a ton on decorations or things that would get shot and possibly broken, so these are the decorations I came up with.

1)  We set up Army guys on every ledge we could think of.  These were super hard targets and only one boy was able to hit them.  I liked how they took up decoration space and made for a fun challenge to hit.  We already had a collection of plastic Army guys, so this didn't cost us any money.  I have seen them on sale at Dollar Tree and other grocery stores for $1-3.

2) I got yellow and orange paper plates on clearance at a local grocery store and they worked perfectly for targets to tape on the walls.  We ended up having enough left over to use as plates for the party too.  Although it took a little time to draw the circles on the plates, it was worth the $2 for paper plates rather than buying pre-made paper targets.

3) This picture isn't great, but I saved up plastic milk and juice jugs and spray painted them desert camo colored and painted targets on them.  We had between 8-10 on ledges around the house and they were also a fun challenge, but a little easier to hit.  They make a nice "thunk" sound when you hit them.  Since I already had the spray paint left over from Gabe's pine wood derby car, this cost us $0!  If you don't have paint, don't worry!  You can always draw or print out targets and tape them on to empty containers.

4)  Balloons.  In typical fashion, I put balloons everywhere.  What is a birthday without big colorful balloons every where anyway?  We didn't splurge on helium balloons that much this year and instead opted to get the regular latex balloons and taped them to the walls and doorways.  The boys thought it was AWESOME to shoot the balloons off the walls and see if they could knock them down.  When they were all knocked down, we did a "skeet" challenge where an adult threw the balloon in the air and the boys took turns trying to shoot it in the air.  I stuck with the yellow, orange, blue color scheme and got three packs of 15 balloons.  Each pack cost me about $1.50 at Target.

There are so many different target shooting challenges you can do and the boys really loved having the teams and having to shoot as fast as they could!  Even though not all the boys knew each other, some were school friends and some from Cub Scouts, all the boys on each team banded together.

After the games, it was time to eat.


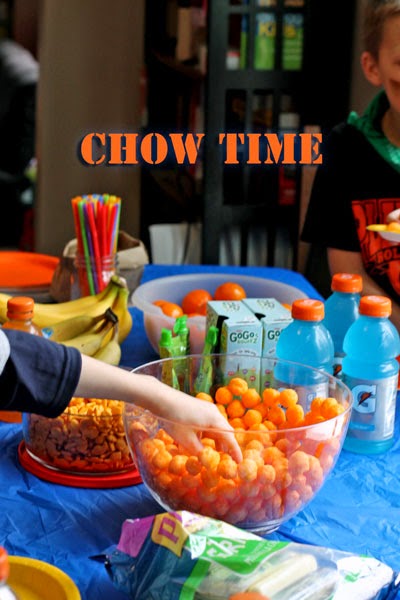
I really wanted to stick with healthy options but also wanted them to have fun (allergy-free) choices.  We had pepperoni pizzas, oranges, carrots, bananas, crackers, cheese balls, string cheese sticks and squeezable applesauce.  I got Gatorade (gasp!) in blue, yellow and orange.  All the boys got to fill their own plates and I was pleasantly surprised when I saw bananas, oranges and apple sauces going on plates.  After eating their fill, we moved on to sing Happy Birthday and gorge ourselves on the Nerf dart cupcakes and ice cream.


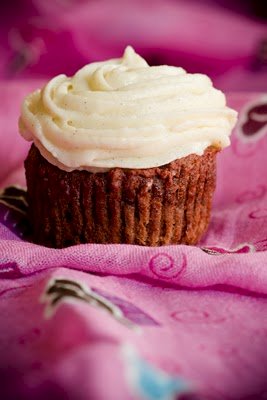
First can I just say - I MADE THESE!  I USED FONDANT AND MADE THESE FROM SCRATCH!

Sorry about that.

This was the first time I made and used fondant and can I also say, What the heck?  It is so easy to make fondant and so easy to use (link below), I am completely disappointed I haven't tried to do it before.  The night before I rolled out the fondant darts and dipped them in chocolate and put them in the freezer to stay hard.  Right before eating, I got them out of the freezer and put them on top of the cupcakes.  All the boys were surprised that they weren't real darts and that they could eat them!  Although they aren't as super cool as some of the other cakes and cupcakes I have seen at other Nerf parties, I am pretty happy that I went out of my decorating comfort zone and made these.

In the end, we put together teams and had an all out Nerf War, taking no prisoners and shooting and ambushing every one in sight.  When the doorbell rang and parents came to pick up the boys, every one seemed disappointed to leave (a sign of a good party) and the parents looked at me like I was a little crazy (running around shooting darts at the other adults).

It was a great birthday party.  A great turn out.  And honestly, a great relief!  Last year, Gabe's Lego birthday party didn't go so well (out of 7 RSVP's, one boy came) and we were all holding our breath that this year would be different.  And it was.

14 boys.
5 adults.
200 darts.
Too much fun.

Try it out!


Here are some more links to other parties I found while researching (Pinterest):

Inspiration for my cupcakes
Thought about doing this if the weather was nice.
Used these in the living room as targets
From Oriental Trading Company
An awesome idea for an inside nerf war

Tuesday, November 12, 2013

My stab at ice cream cake

For every birthday I make the birthday person what ever they want for a dessert. Gabe has had a cookie cake. Matt has asked for a pumpkin pie (surprised? You shouldn't be). But my sister was the first to ever ask for an ice cream cake. I had thought over the logistics of it, but had never tried to execute it before. Recently, I had pinned this Hot Fudge Sundae post by Smitten Kitchen and I turned to this recipe for guidance.


You can really make this cake two ways:
Ice cream, fudgy cookie layer, ice cream (like Smitten kitchen)

Smitten Kitchen - Hot Fudge Sundae Cake
Or cake, fudgy cookie layer, ice cream (which is what I did).


Either way would be divine as long as you pick compatible flavors.
My sister chose chocolate cake and peanut butter cup ice cream.
So I started making the cake the day before I needed it to ensure I had enjoy cooling time for the cake and refreezing time for the ice cream layer. I would advise starting around 18-24 hrs prior to the end time for your cake.

Step One - Cake Layer

Even though I didn't really want to, I ended up shelling out the big bucks ($4) for a gluten-free devil's food cake mix for the cake part. I wanted to make it from scratch but I was on a limited time frame and my kitchen had been torn apart from the window replacement surgery happening on our house.
The one thing that i would change about the cake over all is the ratio, you really want an even or slightly higher ice cream to cake ratio. That might just be me, but we ended up with a higher cake to ice cream ratio and found it lacking a little. When you go to bake your cake portion, make sure to only fill your cake pan (or pans or cupcake pans) 1/4 of the way full. Trust me. I know it doesn't sound like a lot and it will cause you to have remaining batter, but you really want to make sure that after the cake rises there is enough room to add the ice cream. Bake the cake layer for a little less time because it is less thick. When the knife, fork, toothpick, whatever goes out clean - let the cake cool completely and start smashing Oreos with a rolling pin.

Step Two - Fudgy Cookie Layer

SmittenKitchen has an amazing hot fudge syrup recipe on this link to add her homemade chocolate smashed up cookies. I used homemade hot fudge sauce I already had in the fridge and you can definitely use the ice cream hot fudge sauce you get in a jar from the store. Just watch out for the High Fructose Corn Syrup, it's a killer. But seriously. Then I took about half of the bag of Oreo's (not GF - you caught me) and they got ziploc'd and smashed to smitherin's. Smittenkitchen recommends using a food processor to get them properly crushed and pulverized but i found a rolling pin was much more theraputic. Mix about a half cup of hot fudge and about 3/4 cup of Oreo crumbs together. You want the consistency to still be kind of like frosting so that it will spread nicely on top of your cake and not rip off the top layer. Then once the cake is cool, spread the fudgy cookie mixture on top making sure to spread it thin enough that it makes a thin line between the two layers and doesn't become a layer itself. Unless you want it that way. It could be good like that. I ended up with some fudgy cookie mixture left over (which will go great on vanilla ice cream later) so don't feel like you have to use it all. Then put in the freezer for about an hour so the hot fudge will set.

Step Three - Ice Cream Layer

This is really the only tricky part of the whole cake because you want the ice cream to sit out on your counter for long enough to make it spreadable, but not too liquidy that it will spill all over the cake. Freezing the hot fudge layer makes it a protectant against the ice cream so the cake doesn't get soggy, but the ice cream can spill down around the sides of the cake so be careful not to let it get too melty before applying it.
I found that using the back of a large soup spoon worked the best to spread the ice cream. I also kept a bowl of warm water next to the cake and would dip my spoon in it to keep it from sticking and it spread a lot better that way.
I tried to stack my ice cream layer as high as the pan and as flat as possible. If you can't get it even or as high as you want, don't fret. Getting it done quickly so it can refreeze is much more important otherwise it will all melt and get harder to work with. Once this layer if frozen, you can try to go back and add more if you want.

Step Four - Decorations

To decorate my sister's cake, I just whipped up some heavy cream and piped it in circles around the edge, topped off the circles with Reese's pieces. We put a candle in it right before it was time to sing. You can decorate it however you want. Use whipped cream as a frosting or pipe frosting letters on there.

Step Five - Eating

It was delicious. I do recommend letting it thaw a little before trying to cut it or eat it as the cake hardens a little more than the ice cream. But I was amazed at how good it was! It will definitely be on the rotation for birthday cake ideas!


Follow my blog with Bloglovin

Tuesday, October 29, 2013

"Ninnie (Minnie) Mousie" birthday party and links

When I first ask Calla what kind of birthday party she wanted, "Ninnie Mousie" was what came out. 

"Ninnie Mousie birthday party!  Ninnie Mousie!!"  

And for the last month. 

"Ninnie Mousie!!  Ninnie Mousie party, Mom!"  
"I know Calla, you are having a Minnie Mouse birthday party."  
"Ninnie Mousie!"

Ever since we went to Disney World this summer, Calla has been obsessed with Minnie Mouse and Cinderella.  I decided on a Minnie Mouse party because I thought it fit her age group the best.  And it works perfectly that she can wear her costume to her birthday party (the upside of a Halloween birthday, I guess).  So once the theme was decided, I began scouring the internet for party and decoration ideas.  My birthday parties are always planned in advance and thoroughly thought through.  

This is what ended up coming together.


Many might say that I am cliche or overdoing it, but I don't care.  I always have a banner or pennant saying "Happy Birthday" somewhere in the house and hang streamers from the ceiling.  I ALWAYS do this.  For EVERY birthday party.  Because... birthdays are special.  And even though the streamers fall down numerous times during the day, it is worth it to see my kids so excited.  I want them to know how much of a celebration it is that they were born.  How much fun and happiness they bring to my life.  So I go over the top decorating and planning.  And I will... for as long as I am able.

We are a sucker for balloons at birthday parties.  Everyone gets a ton of balloons.  And even though they are kind of a waste (the helium is dead by that night), they totally set the mood for the birthday party and provide fantastic entertainment.  I have seen old kids (7 and up) and young ones (1 and up) all enjoy the bouncy fun of a balloon.  I was so excited to see these polka dot ones (here).  They fit perfectly into the Minnie Mouse theme.

In keeping with the Minnie Mouse theme, I immediately set out how to decorate a cake for Minnie Mouse.  Every year, the birthday kid gets their own personal cake.  It is a 6 inch pan I bought while we were living in South Korea (you can buy one here) and works perfectly with cake mixes from boxes (you end up with 18 cupcakes instead of 24).  This is another thing that I do specially every year.  Something my kids count on every year, knowing that they get a whole cake to themselves.  They can eat as much or as little of it as they want (it is their party after all) and it can be decorated how ever they want.  It might sound strange or like extra work, but when it is party time - they love it so I love it.

I found another blog that used Double Stuff Oreos and mini Oreos to get the Mickey Mouse effect, so I used that example along with edible pearls to decorate the tops of the cupcakes and Calla's personal cake.

I wanted to have another treat option - in case there weren't enough cupcakes or as a back up plan in case the cupcakes didn't turn out exactly how I wanted - so I bought a Mickey Mouse cookie cutter (can buy this here) and dyed the marshmallows different shades of pink for effect.

Another food choice was trail mix.  My kids LOVE trail mix.  Any thing with nuts and raisins and they go crazy.  I found half of this mix from Target (Peanut Butter and Jelly Trail mix) and added shredded coconut, almonds, peanuts and raisins to bulk it up a little bit.  I liked that it had the pink and purple yogurt covered raisins.

Over all the party was a huge success.  Calla had a great time seeing all her family on all sides and loved being the center of attention (as long as Mom was in sight).  She loved dressing up in her Minnie Mouse costume and had a riot playing with her new Princesses and castle.  However, Calla's favorite present was the chap stick my Grandma got her.  Never fails.  

Zander is also a big fan of Calla's new toys.  Pink is just a color, right?


There are a lot of amazing ideas online for Minnie Mouse birthday parties.  I pulled some ideas from these blogs, but there were a lot of ideas that I didn't a chance to do.  Check 'em out!

No Link

Sugar Fresh Designs - Free Minnie Mouse Banner
Peonies and Poppyseeds - Minnie Mouse Birthday Printables
No Link
LoveThisPic - Minnie Mouse Party Pictures
FunPicBoard
This is the recipe I used for Calla's Red Velvet cake and cupcakes.  I ended up tripling the recipe as it says it makes 10 cupcakes.  Also, I used Namaste Gluten Free All Purpose Flour instead of the King Arthur brand, 1 tablespoon of red food coloring and added 1/2 cup of oil to the batter to add moisture.  It had rave reviews and turned out delicious.  I will warn you that it is much more dense than a standard cake mix cake and is more the consistency of a pound cake - but still very good.

Cupcake Project - GF Red Velvet Cupcakes
Follow my blog with Bloglovin

Monday, October 28, 2013

Calla's 2nd birthday

     My last baby turned two on Saturday.  Did you hear that?  It was the sound of my heart breaking a little.  She has come so far in such a small amount of time that it astounds me.  I can't believe how much she talks, how much she knows and repeats and how much she can do by herself.  I don't know if it is being the third child or if it is just because she is so dang smart, but she is all kinds of helpful and a handful at the same time.  

    Calla Jane - I have loved you since before you were born.  You are everything I could ever want in a little girl and more.  You make me smile and laugh when I am having a rough day.  You are fiercely independent and capable of more than I could ever imagine.  I love your "from the toes" laugh, the way you smile with your teeth and the way care for everyone around you.  I see you growing up right in front of my eyes and I can't wait to see the woman you become.  

Just slow down a little first.

Happy birthday angel baby.


Other favorite "Calla" posts:
The Birth of Baby Calla
Calla's First Birthday party
Calla's First Smile
Calla and Her Daddy